

Custom manufacturing equipment is a big challenge. It’s often very specialized, leading to long setup times. The Single-Minute Exchange of Die (SMED) method helps solve this problem.
The first step to a quick changeover is to analyze the current setup. You can’t improve without knowing exactly how things work now.
Start by recording the whole process from start to finish. Every move and wait time should be caught on camera. It’s important to get input from those doing the work.
For example, a company that makes specialty adhesives found 30 minutes of unnecessary steps. This showed them where to focus their efforts for improvement.
This initial step turns vague ideas into a clear plan. It shows which steps can be made faster or even cut out. This leads to big efficiency gains.
Map the current changeover with video time study
A video time study gives a detailed look at the current changeover. It shows every action and inefficiency. This method turns subjective opinions into clear data.
The main goal is to sort each activity using SMED’s core principle. Tasks are labeled as either internal setup or external setup. This is key for making improvements.
Internal setup tasks make the machine idle. They start only after production stops. Examples include changing a die or adjusting software.
External setup tasks, on the other hand, can be done while the machine runs. This includes preparing materials or tools. The goal is to make more tasks external.
Staging is a practical use of this analysis. It means getting everything ready before the changeover starts. Tools and parts are placed where the operator can easily find them.
| Task Type | Definition | Example Activities | Impact on Changeover Time |
|---|---|---|---|
| Internal Setup | Requires machine to be stopped and idle. | Installing new fixtures, mechanical adjustments, cleaning internal parts. | Directly increases machine downtime; target for reduction. |
| External Setup | Can be completed while machine is operational. | Pre-staging tools, transporting materials, pre-heating components, completing paperwork. | Zero impact on downtime if performed correctly. |
| Staging (External) | Advanced preparation of all needed items at a kitting station. | Creating tool carts, pre-measuring parts, labeling kits, verifying kit completeness. | Dramatically reduces the internal setup phase by eliminating searches and delays. |
Studies show the effectiveness of this method. Companies that use staging cut machine idle time by 30% to 50%. It highlights unnecessary movements, like searching for tools.
For professionals, the next step is clear. Review the video and tag each step. Then, improve the workflow by moving tasks to the external category. A SMED changeovers guide can help with this.
The end result is a future-state map. It shows a changeover with more external tasks and fewer internal ones. This map guides the physical and procedural changes in later steps.
Separate internal vs external tasks; stage tools/parts/kits
Separating internal setup tasks from external work is key to reducing changeover time. This is at the core of the SMED method. It makes a quick changeover possible.
Internal tasks stop the equipment completely. No production happens then. Examples include removing old tooling, installing new dies, or calibrating machine parameters.
External tasks are done while the machine runs. This includes gathering tools, pre-heating materials, or preparing paperwork. Changing internal tasks to external ones cuts down time.
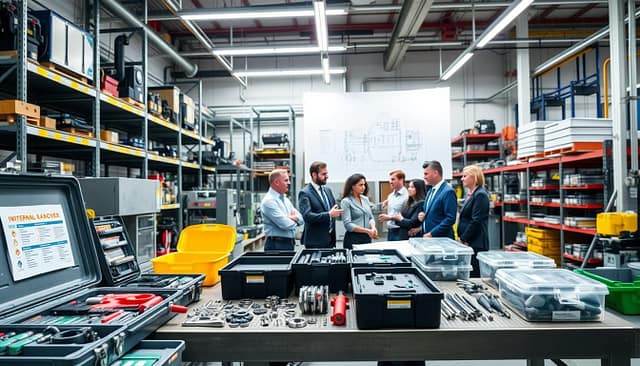
Staging tools, parts, and kits is a big help. It stops the waste of searching and fetching. Every item needed for the next job should be ready and within reach before the machine stops.
| Task Category | Definition | Example Activities | Impact on Changeover Time |
|---|---|---|---|
| Internal (Setup) | Work done only when machine is stopped. | Disassembly, mounting, alignment, testing. | Directly adds to downtime. Target for minimization. |
| External (Preparation) | Work done while machine runs. | Fetching tools, pre-setting gauges, completing checklists. | Eliminated from downtime. Enables faster switch. |
| Staging | Advanced external preparation of kits. | Organizing all tools/parts for next job in a cart. | Dramatically reduces internal adjustment and search time. |
After separating tasks, focus on making internal setup faster. Mechanical solutions can greatly improve this. They aim to make tasks quicker, simpler, and less error-prone.
Quick-release clamps replace traditional bolts and wrenches. They let tools and fixtures be removed and secured in seconds. This can cut disassembly time in half.
Tool-less guides and alignment pins ensure components fit perfectly without manual adjustment. This cuts down minutes from the installation phase.
Zero-point fixturing systems offer a master mounting interface. Swapping tooling plates with a single lever action ensures precise positioning every time.
Digital preset recipes automate setting configurations. An operator recalls a stored program instead of manually entering settings. Machine parameters load instantly.
These technologies lead to a quick changeover process in minutes. A real-world example in a resins manufacturing plant shows this. Quick-connect fittings for mixing equipment lines transformed a lengthy process.
Operators no longer need wrenches for hoses. This, along with pre-staged material kits, halved changeover time. The investment paid off through increased flexibility and capacity.
In summary, separating tasks and staging materials is key. Mechanical innovations then speed up the internal setup. This two-step approach is essential for a top-notch quick changeover standard.
Mechanics: quick‑release clamps, tool‑less guides, zero‑point fixturing, preset recipes
Quick-release clamps and zero-point fixturing make changing over easy and predictable. They solve the setup’s physical problems. This means less manual work and more consistent results.
The goal is to remove waste and variability from the setup process. This supports error-proofing (poka-yoke) by making mistakes hard to make.
Quick-Release Clamps replace old bolts and nuts. They can be secured or released with just one lever or a quarter-turn. This saves a lot of time. Some systems even use color-coding to help avoid mistakes.
Tool-Less Guides and Locators make sure parts fit right without needing to measure or adjust. They use dowel pins and guides to block wrong positions. This makes it easy for the operator to place parts correctly.
Zero-Point Fixturing Systems are the most efficient. They have a master plate that accepts different tooling plates. Changing over is as simple as unlocking one and locking in another. This keeps everything aligned perfectly.
Preset Recipes and Digital Integration bring mechanics into the digital world. Tool settings and paths are saved as recipes. Choosing a recipe from a menu configures everything automatically. This cuts down on manual errors.
The table below shows how SMED solutions improve over traditional methods:
| Traditional Method | SMED Mechanical Solution | Primary Benefit |
|---|---|---|
| Standard hex bolts and wrenches | Quick-release lever clamps | Eliminates tool search; reduces fastening time by over 80% |
| Manual measurement with calipers/gauges | Precision tool-less guides and hard stops | Removes adjustment time; ensures repeatable positioning |
| Custom fixture alignment each use | Zero-point fixturing system | Changes fixtures in under a minute; guarantees accuracy |
| Manual parameter entry on controls | Preset digital recipes | Eliminates data entry errors; ensures optimal machine settings |
These mechanics need an initial investment in design and hardware. But they make changeovers faster, more reliable, and less dependent on skill. They also reduce physical and mental strain, making it easier to do things right.
Using color-coding makes these mechanics easy to understand. It turns complex tasks into simple, mistake-proof steps. When mechanics and error-proofing work together, changeover times and errors drop significantly.
Error‑proofing: color‑codes, checklists, torque indicators
Error-proofing makes changeovers reliable and repeatable. It prevents mistakes before they happen. This is a key part of the SMED method for custom equipment.
Effective error-proofing uses simple, visual, and physical cues. These cues help avoid mistakes by making the right action the only choice.
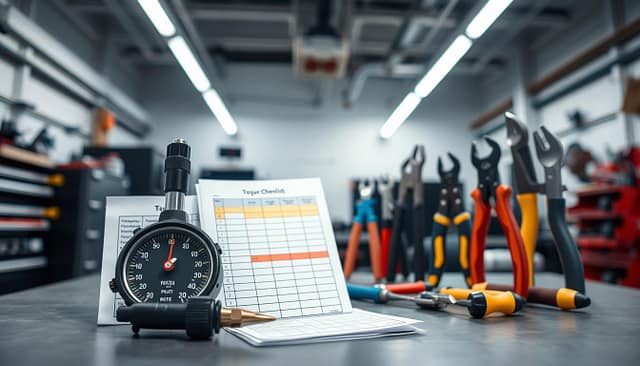
Color‑coding offers quick visual guidance. It makes it easy to find tools and parts. For example, all hydraulic lines for a module are the same color.
This method speeds up staging and finding parts. It makes it clear when something is wrong.
Detailed checklists ensure every step is followed. A good checklist is clear and includes checks. It helps the team follow the same steps.
Digital checklists on tablets can include photos or videos. This helps with training and quick reference. Checklists keep things consistent across shifts.
Torque indicators prevent over- or under-tightening. They are important for avoiding leaks and part failures.
Preset torque wrenches or tools with audible clicks give clear feedback. They make the process consistent. This protects the equipment and product quality.
To use these tools well, organize them carefully. Store them near where they are used and label them clearly. This supports the error-proofing process. For more on designing these fail-safes, see this resource on poka-yoke solutions and error-proofing.
| Error-Proofing Method | Primary Function | Key Implementation Consideration |
|---|---|---|
| Color-Coding | Visual standardization and rapid part identification | Use a consistent, intuitive scheme across all equipment and staging areas. |
| Checklists | Sequential task verification and compliance assurance | Involve operators in creating and updating lists to ensure usability and buy-in. |
| Torque Indicators | Mechanical precision control for fastening operations | Calibrate tools regularly and train on proper use to prevent false readings. |
It’s common to resist new procedures. But, getting the team involved in choosing and testing tools helps. Showing how these tools solve a problem quickly makes them valuable.
Error-proofing makes sure changeovers are both fast and flawless. This reduces downtime and scrap, and improves safety.
Train the team; simulate with dry runs
Reducing changeover time is a big win. But making it consistent and reliable is even more important. This needs formal training and strict procedures.
Teams should practice the new steps through dry runs and simulations. These help confirm the task order. They also build confidence and muscle memory in the operators. Plus, they spot any hidden problems before real production starts.
To keep up the good work, you need a way to measure it. Use key performance indicators to track how well you’re doing. Look at how much time you save and how often you’re in production. This shows how well the quick changeover is working.
Regular audits are key for ongoing improvement. Use a standard audit sheet to check if you’re following the process correctly. This Lean tool helps you see how you’re doing and where you can get better. Every time you find a problem, you can fix it and keep improving.
Building a culture of excellence is all about this systematic approach. Training, simulation, measurement, and audits create a strong foundation. This discipline helps your quick changeover improvements last. It keeps you ahead in custom equipment making.


